This process involves four main steps:
- Make changes to the underlying SQL table or view or Web service
- Make changes to the BDC application definition file
- Refresh User profile BDC import connection
- Map field to a property in the user profile
1. Make changes to the underlying SQL table or view or Web service
Assuming changes need to be made to the underlying data source or web service, these changes need to occur before any other changes.
2. Make changes to the BDC application definition file
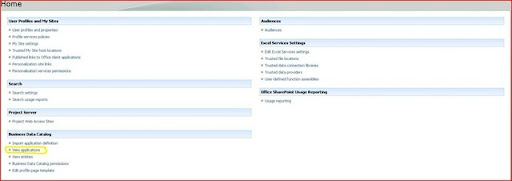
The BDC application file is an XML file that specifies all of the properties for the data connection and the methods and actions that can be executed. To make changes to the BDC application definition file, you can either edit the XML directly or edit with a specific tool such as the BDC Meta Man or Microsoft's BDC Definition Editor. In this example, we'll use the Microsoft tool. In any case, the first thing you'll need to do is export the current definition file from the BDC interface in Shared Services. Navigate to the main shared services page and select the view applications link:
This will display all of the current BDC applications:
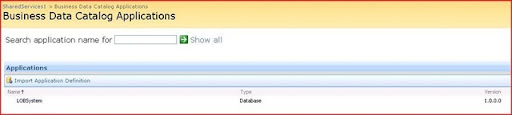
Next use the hover menu and select "Export Application Definition". This will display the Export screen. In most cases you'll simply accept the default options and hit Export:

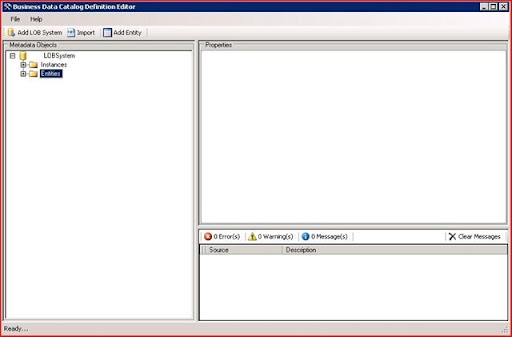
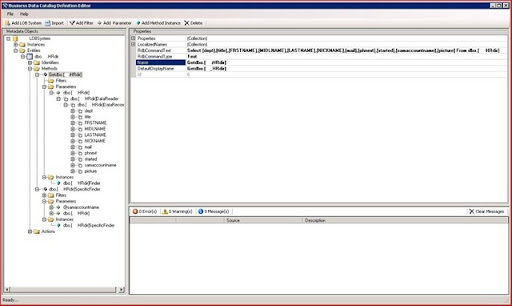
Now that you have exported the BDC application definition you can import it into the Microsoft BDC editor tool. As an aside, this tool ships with the MOSS 2007 SDK but you have to install it separately. The installer is found in the C:\Program Files\2007 Office System Developer Resources\Tools\BDC Definition Editor folder. From the main menu in the BDC Editor, select Import, navigate to the file you just exported and click OK. Your editor window should now look something like this:
Next, right click the root node and select properties. If you plan on re-importing the application with the same name, you'll need to modify the version number.
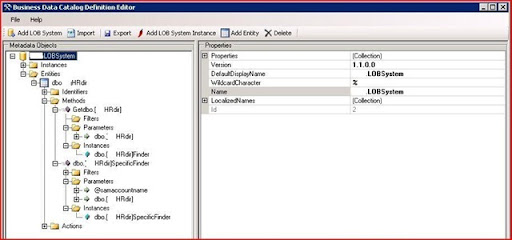
Next, expand the Entities ==> Methods node and edit the rdbCommandText for each of the methods. If this is a default SQL connection there will be two methods: a simple get all and a specific finder. In this case we simply added an additional field to the query string.
Now that the command text is edited to how you would like to see it, you'll need to make sure the data reader node matches the rdbCommandText you just edited. In our case we wanted to add a field, so we add a type descriptor and give it a name. Again, this need to be done in every data reader in the application definition.
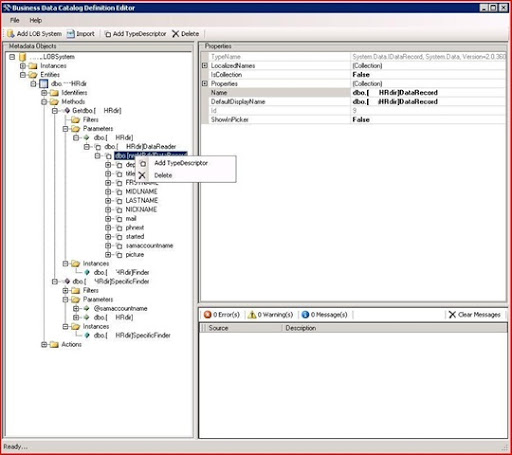
If you want to test the edits you've made right click on any of the instances and select execute. This will let you ensure everything is configured correctly before you import the definition back into MOSS. Once everything is good, export the app definition file from the editor and close it.
The last step is to import the application definition in the MOSS SSP BDC interface. Navigate to the main shared services page, select the view applications link, click on the Import Application Definition link, and select the file we just exported from the BDC Editor. Whew, done with that step. It seems like a lot of steps, but when you run through it a couple of times, it's really not as bad as it might seem now.
3. Refresh User profile BDC import connection
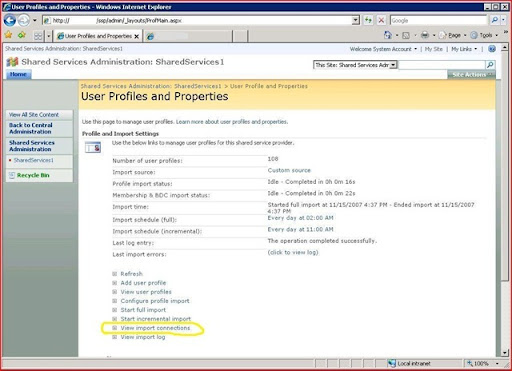
Ok, now that we have the updated BDC connection the next step is to refresh the user profile BDC Import Connection. In my experience, I have not seen the changes from step #2 automatically propagate to the user profile BDC Import Connection. If someone knows how to force this propagation, please let me know. To get the import connection current you need to delete the old connection and re-create it. This is a very straightforward process. Navigate to the User Profile Import connections in the SSP. (SSP==>User Profiles and Properties==>View Import Connections)
If you are not sure how it was configure the first time around it's a good idea to click the edit link and review the configuration settings before deleting. Next, Note the import connection name and select delete from the hover menu for the BDC import connection we have been editing.
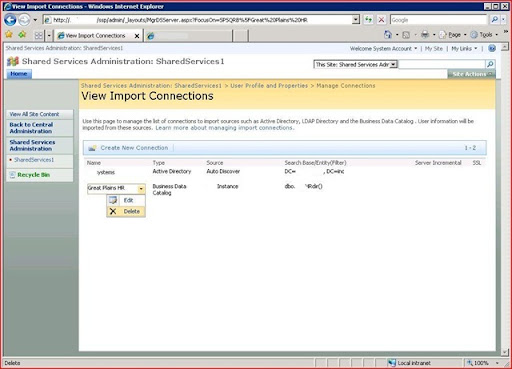
Then, from the same screen, click the "create new connection" link and re-configure your BDC connection with the same parameters used before. When you are done with this step the manage connections screen should be identical to as it was when we started. Note: all of your previously mapped profile properties will still work as long as you name the import connection the same name as it was before deletion.
4. Map field to a property in the user profile
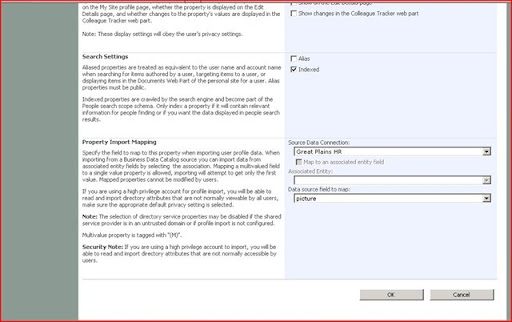
OK, we're almost to the finish line now. The last step to complete is to map the BDC import field to a user profile property. To do this go to the main User Profiles and properties page and down towards the bottom select the "view profile properties" link. On this page navigate to the property you would like to map and select edit from the hover menu.

On the next screen scroll down to the last section and select your BDC connection and field you would like to be mapped to this property.
There now you've completed the configuration and the next time the import process is run, your user profile property will be updated.
-Chris
No comments:
Post a Comment