Monday, November 19, 2007

Modifying the fields in a User profile Business Data Catalog (BDC) import connection

This process involves four main steps:

  1. Make changes to the underlying SQL table or view or Web service
  2. Make changes to the BDC application definition file
  3. Refresh User profile BDC import connection
  4. Map field to a property in the user profile

1. Make changes to the underlying SQL table or view or Web service

Assuming changes need to be made to the underlying data source or web service, these changes need to occur before any other changes.

2. Make changes to the BDC application definition file

The BDC application file is an XML file that specifies all of the properties for the data connection and the methods and actions that can be executed.  To make changes to the BDC application definition file, you can either edit the XML directly or edit with a specific tool such as the BDC Meta Man or Microsoft's BDC Definition Editor.  In this example, we'll use the Microsoft tool.  In any case, the first thing you'll need to do is export the current definition file from the BDC interface in Shared Services.  Navigate to the main shared services page and select the view applications link:

SSP 

This will display all of the current BDC applications:

application

Next use the hover menu and select "Export Application Definition".  This will display the Export screen.  In most cases you'll simply accept the default options and hit Export:

Export Application

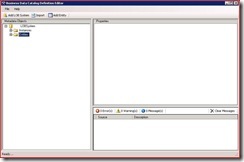
Now that you have exported the BDC application definition you can import it into the Microsoft BDC editor tool.  As an aside, this tool ships with the MOSS 2007 SDK but you have to install it separately.  The installer is found in the C:\Program Files\2007 Office System Developer Resources\Tools\BDC Definition Editor folder.  From the main menu in the BDC Editor, select Import, navigate to the file you just exported and click OK.  Your editor window should now look something like this:

BDCAfterImport

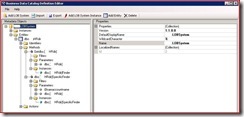
Next, right click the root node and select properties.  If you plan on re-importing the application with the same name, you'll need to modify the version number.

BDC_Version

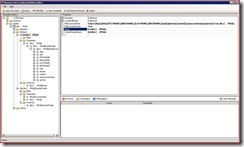
Next, expand the Entities ==> Methods node and edit the rdbCommandText for each of the methods.  If this is a default SQL connection there will be two methods: a simple get all and a specific finder.  In this case we simply added an additional field to the query string.

BDCEditRDBCommand

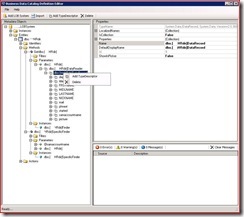
Now that the command text is edited to how you would like to see it, you'll need to make sure the data reader node matches the rdbCommandText you just edited. In our case we wanted to add a field, so we add a type descriptor and give it a name.  Again, this need to be done in every data reader in the application definition.

BDC_AddTypeDescription

If you want to test the edits you've made right click on any of the instances and select execute.  This will let you ensure everything is configured correctly before you import the definition back into MOSS.  Once everything is good, export the app definition file from the editor and close it.

The last step is to import the application definition in the MOSS SSP BDC interface.  Navigate to the main shared services page, select the view applications link, click on the Import Application Definition link, and select the file we just exported from the BDC Editor.  Whew, done with that step.  It seems like a lot of steps, but when you run through it a couple of times, it's really not as bad as it might seem now.

3. Refresh User profile BDC import connection

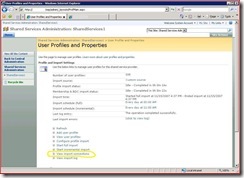
Ok, now that we have the updated BDC connection the next step is to refresh the user profile BDC Import Connection.  In my experience, I have not seen the changes from step #2 automatically propagate to the user profile BDC Import Connection.  If someone knows how to force this propagation, please let me know.  To get the import connection current you need to delete the old connection and re-create it.  This is a very straightforward process.  Navigate to the User Profile Import connections in the SSP. (SSP==>User Profiles and Properties==>View Import Connections)

UserProfile

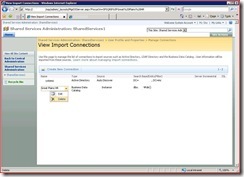
If you are not sure how it was configure the first time around it's a good idea to click the edit link and review the configuration settings before deleting.  Next, Note the import connection name and select delete from the hover menu for the BDC import connection we have been editing. 

DeleteProfileImportConnection

Then, from the same screen, click the "create new connection" link and re-configure your BDC connection with the same parameters used before.  When you are done with this step the manage connections screen should be identical to as it was when we started.  Note: all of your previously mapped profile properties will still work as long as you name the import connection the same name as it was before deletion.

4. Map field to a property in the user profile

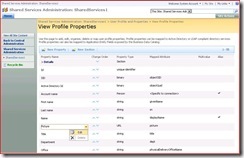
OK, we're almost to the finish line now.  The last step to complete is to map the BDC import field to a user profile property.  To do this go to the main User Profiles and properties page and down towards the bottom select the "view profile properties" link.  On this page navigate to the property you would like to map and select edit from the hover menu.

editProfileProperty1

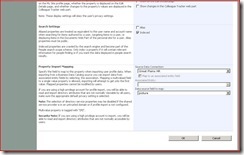
On the next screen scroll down to the last section and select your BDC connection and field you would like to be mapped to this property.

editProfileProperty2

There now you've completed the configuration and the next time the import process is run, your user profile property will be updated.

-Chris

Thursday, November 8, 2007

Project Server and MOSS integration series forthcoming

We've just finished the design phase of a project involving an existing MOSS intranet environment and the addition of a Project Server application.  Since things are fresh in my mind, I thought I would attempt to complete a blog series about this integration effort and some of the tips and tricks we found out through the process.  I am expecting to complete the following posts in the near future:

  1. Part 1: Introduction to the integration points in a combined  MOSS and Project Server environment and why you should care
  2. Part 2: What is a Project Server project workspace?
  3. Part 3: Design considerations for integrating project workspaces into your existing intranet taxonomy
  4. Part 4: Using project web access webparts in your MOSS sites

-Chris

Monday, November 5, 2007

Configuring Excel Services and Data Connections

When you surface an excel spreadsheet using excel services and the excel web access webpart there are several places that you need to configure to ensure that excel files with data connections work properly.  In this scenario, we have an excel spreadsheet with an embedded data connection that we needed to surface in a MOSS 2007 intranet environment.  At a high level the components that need to be configured are as follows:

  1. the Excel spreadsheet's data connection properties
  2. Shared Service Provider (SSP) Excel Services Settings
  3. SSP Trusted file location properties
Excel spreadsheet

First go into to the Excel spreadsheet and configure the data connection properties.  In this case we're using an embedded connection - in another post we'll describe how to configure a data connection file.

image

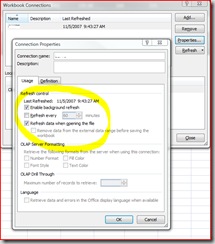
Select connections, then in the resulting dialog box highlight the data connection and click properties.  You should now see the following:

image

In the usage tab, you can set a couple of different refresh options.  In our case, we wanted to have the data refreshed when the file is opened.

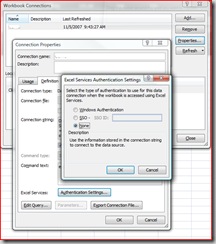
Switching to the Definition tab and clicking on the authentication settings should give you the following dialog box:

image

For our case we wanted to use the credentials embedded in the spreadsheet's data connection so we selected the "None" option.  Click OK and close all of the dialog boxes.  The excel spreadsheet configuration is complete (assuming your data connection string is properly configured).

SSP Excel Services Settings

Now open your SSP and navigate to the Edit Excel Services Settings under the Excel Services Settings header in the right column.  In the last section titled "External Data" make sure the Unattended Service Account is completed with a domain level service account.  If you do not have a windows domain account entered here you will likely get errors when you try to refresh the data connection.

image

SSP Trusted file location properties

Lastly, go into "Trusted File Locations" under the Excel Services Settings header in your SSP and configure them.  There are three particular sections we'll be concerned with right now:

  • Location
  • Calculation behavior
  • External Data

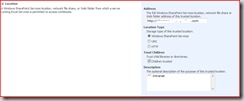
Within the location section simply add the URL of the document library you want to serve your Excel spreadsheets from.  Alternately you can trust the child sites/libraries if this is appropriate.

image

Next scroll down to calculation behavior and modify the cache lifetime and calculation mode.  In our case, we set the mode to automatic.

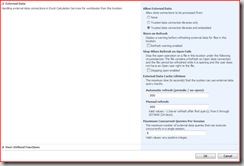
Lastly, under External Data make sure the following settings are configured properly:

  • Allow external data: Trusted data connections and embedded
  • Warn on Refresh: make sure this is unchecked or you'll get a fairly unfriendly warning screen before users can access the spreadsheet.  Many of our users thought this indicated something was broken

.image

One last point to make about trusted file locations has to due with the Trust children option.  Be careful when you use this setting and the have other folks add other trusted file locations that are under the parent location you set up.  In this scenario it is very easy to get things out-of-sync or at least see behavior that you wouldn't expect given your original settings.

That should get you started using Excel Services and embedded data connections.

-Chris

Friday, November 2, 2007

Project Web Access - Managing Views

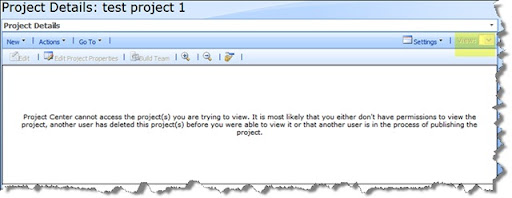
This is a simple thing that is not always a quick find. The team members could see their tasks, but unable to drill down into project details. Below is the error and take note "View" is grayed out.

pwa_view_eror

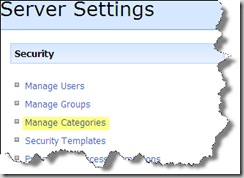
Go into server settings... "Manage Categories"

svr_settings

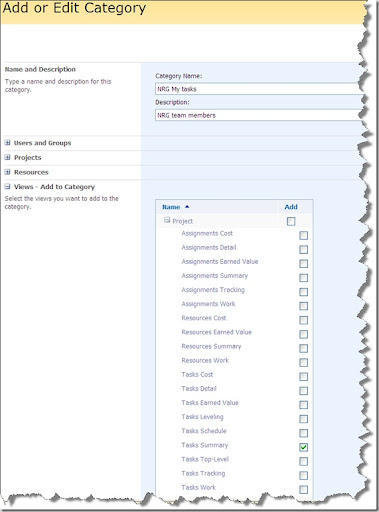
Select the category that includes Team Members. Scroll down to "Views - Add to Category" and select the "Task Summary" check box.

view_cat

The hardest part is finding the setting when using Categories.

-Scott

Event ID: 5553 & Event ID: 7888

Here is an issue that I came across that might be helpful for others. We were seeing these 2 errors recurring every hour in the application logs.

The synchronization runs every hour by default to ensure that the content database will be included in membership and profile information.

The most likely cause is a content database was moved, copied and used in same farm without being detached properly.

To avoid this situation always remember to run this command before moving content database:
stsadm -o preparetomove -contentDB database_server:database_name

This operation will allow the membership and profile synchronization to be included when you reattach the content database. If this is skipped it will result in static membership and profile information within the content database, preventing it from getting synchronized when it’s reattached.


//-----------------------------------------------------------------
Event Type: Error
Event Source: Office SharePoint Server
Event Category: User Profiles
Event ID: 5553
Date: 9/26/2007
Time: 4:01:02 PM
User: N/A
Computer: WEBSTER
Description:
failure trying to synch site a7b12d90-7d1d-4341-8df3-a1d92eba7a47 for ContentDB db7fb0d6-7d0d-4230-8de5-e7cc00ca0db7 WebApp 55de867d-5a9d-4ac4-83d6-f3ee9ee98df2. Exception message was Cannot insert duplicate key row in object 'dbo.UserMemberships' with unique index 'CX_UserMemberships_RecordId_MemberGroupId_SID'.
The statement has been terminated..
For more information, see Help and Support Center at http://go.microsoft.com/fwlink/events.asp.

//----------------------------------------------------------------
Event Type: Error
Event Source: Office SharePoint Server
Event Category: Office Server General
Event ID: 7888
Date: 9/26/2007
Time: 4:01:02 PM
User: N/A
Computer: WEBSTER
Description:
A runtime exception was detected. Details follow.
Message: Cannot insert duplicate key row in object 'dbo.UserMemberships' with unique index 'CX_UserMemberships_RecordId_MemberGroupId_SID'.
The statement has been terminated.
Techinal Details:
System.Data.SqlClient.SqlException: Cannot insert duplicate key row in object 'dbo.UserMemberships' with unique index 'CX_UserMemberships_RecordId_MemberGroupId_SID'.
The statement has been terminated.
at System.Data.SqlClient.SqlConnection.OnError (SqlException exception, Boolean breakConnection)
at System.Data.SqlClient.SqlInternalConnection.OnError (SqlException exception, Boolean breakConnection)
at System.Data.SqlClient.TdsParser.ThrowExceptionAndWarning (TdsParserStateObject stateObj)
at System.Data.SqlClient.TdsParser.Run(RunBehavior runBehavior, SqlCommand cmdHandler, SqlDataReader dataStream, BulkCopySimpleResultSet bulkCopyHandler, TdsParserStateObject stateObj)
at System.Data.SqlClient.SqlCommand.FinishExecuteReader (SqlDataReader ds, RunBehavior runBehavior, String resetOptionsString)
at System.Data.SqlClient.SqlCommand.RunExecuteReaderTds (CommandBehavior cmdBehavior, RunBehavior runBehavior, Boolean returnStream, Boolean async)
at System.Data.SqlClient.SqlCommand.RunExecuteReader (CommandBehavior cmdBehavior, RunBehavior runBehavior, Boolean returnStream, String method, DbAsyncResult result)
at System.Data.SqlClient.SqlCommand.InternalExecuteNonQuery (DbAsyncResult result, String methodName, Boolean sendToPipe)
at System.Data.SqlClient.SqlCommand.ExecuteNonQuery()
at Microsoft.Office.Server.Data.SqlSession.ExecuteNonQuery (SqlCommand command)
at Microsoft.Office.Server.UserProfiles.WSSSynchSqlSession.SynchExecuteNonQuery (SqlCommand cmd, Boolean throwOnFail)
at Microsoft.Office.Server.UserProfiles.WSSSynchSqlSession.SynchExecuteNonQuery (SqlCommand cmd)
at Microsoft.Office.Server.UserProfiles.SiteSynchronizer.WriteChangeLogConsumed()
at Microsoft.Office.Server.UserProfiles.SiteSynchronizer.Synch()
at Microsoft.Office.Server.Diagnostics.FirstChanceHandler.ExceptionFilter (Boolean fRethrowException, TryBlock tryBlock, FilterBlock filter, CatchBlock catchBlock, FinallyBlock finallyBlock)
For more information, see Help and Support Center at http://go.microsoft.com/fwlink/events.asp.
//-----------------------------------------

Probable cause is due to backing up our current content DB and restoring it to a different application on the same farm.

What happened is the GUID for the content DB is the same causing a conflict during the sync process.

Following steps are a workaround the issue:

Get a list of the content databases GUIDs that are being affected.
Stsadm -o sync -listolddatabases 0

Now run a Select Query on the Config Databases “dbo.Objects” table and look for the GUID that matches the listed GUID.

Database: Sharepoint_Config, Table dbo.Objects

SELECT Id, ClassId, ParentId, Name, Status, Version, Properties
FROM Objects
WHERE (Id = '5bafe2af-48a7-4043-a36d-29160f3b88e2')


In our case this is just a development/testing site that will not be around for long so we just excluded it from the sync process.
Stsadm –o sync –ExcludeWebApps URL of webapplist

But for those that are not as fortunate as us you will want to do a full detach and rebuild of the content database. This will enable the Content Database to get new GUID and be included in the sync process.

Detach Content Database. This will not delete your database only break the association.
stsadm -o preparetomove -contentdb -ContentDB SQLserver:DB_NAME -site http://website
stsadm -o deletecontentdb -url http://website -databaseserver SQLserver -databasename DB_NAME

Reattach Content Database.
stsadm -o addcontentdb -url http://website -databasename DB_NAME -databaseserver SQLserver

Helpful "sysadm –o sync" options can be found here.

-Scott